Website speed is a critical factor for SEO ranking. And images are one of the main factors affecting page load speed; High quality images are good for user experience, but it increases the load time and user bounce rate. That’s why you need to resize and optimize images for website before uploading. The key is to resize file size, not reducing the quality.
What’s the difference between Resizing image and Compressing image?
Resizing an image means reducing its physical dimensions (width and height), resulting in smaller file size. Using the image compression also reduce the file size, but without changing its dimension. The new SEO trend is the resizing image along with lossy compression for faster speeds and higher SEO rankings.

How to resize image online without losing quality
If you don’t want to download any software or simply need a quick editing, you can easily resize images on your browser. EdiKer is a simple and easy-to-use image resizing tool for JPEG and PNG photos. This bulk photo resizer enables you to resize images online without losing quality. It’s free and no registration needed.
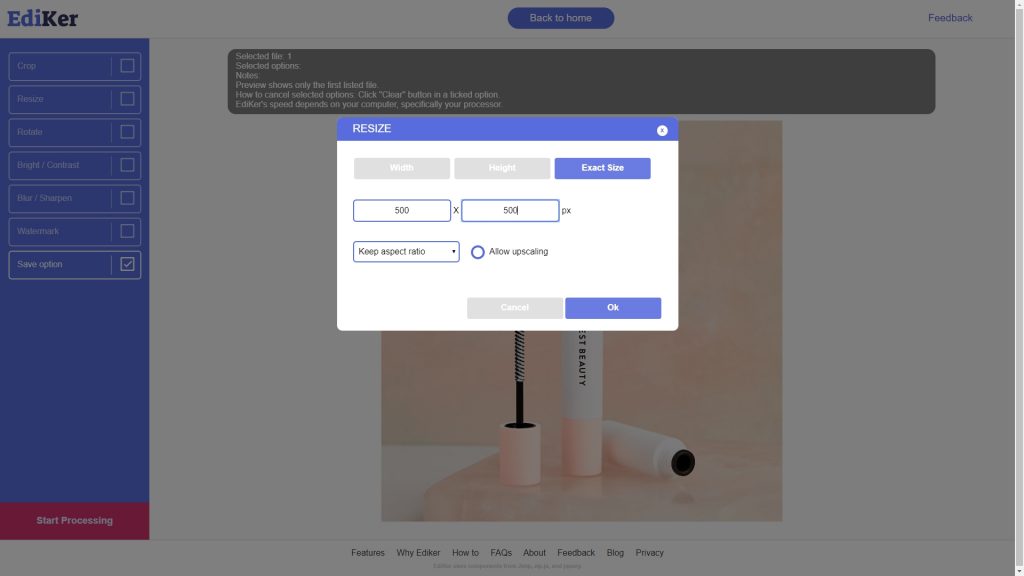
Simply upload your image from your computer, then it will take you to a page when you can crop the photo, resize the image, watermark picture and save your work. You can save your images as a JPG or PNG. You can optimize your images using JPEG compression option.
How to compress images for the web without losing quality?
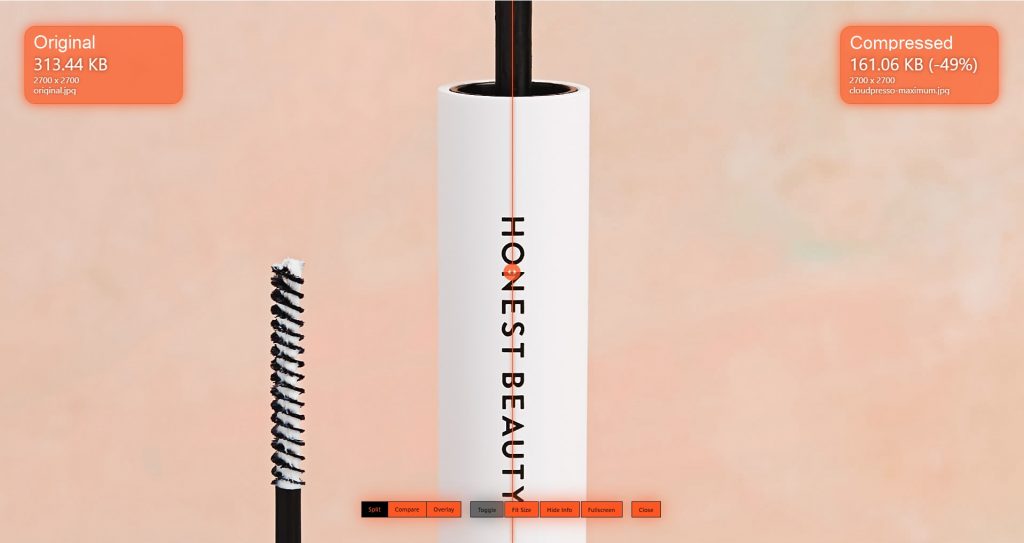
If you want to optimize your images without losing quality, we recommend another online tool. Generally, image quality and file size are a trade off. The higher the quality of your images, the bigger the file size. In order to have the right file size, you need find the optimal balance between the quality and the file size. There are many useful online tools to help you to show off their optimization techniques for JPEG, PGN and GIF file format. Probably the most elegant web solution is the CloudPresso that allows you to adjust the compression level of the images. If you want to compress images without losing quality, select “Maximum” for output quality. If you want to compress further to smaller size, select “Very High”. For the smallest file size, “High” is recommended. Getting smaller file size resulting a (slightly) pixelated image.
Summary
As you have experienced, images always result in some degradation to a re-saving. But by using different tools, such as EdiKer and CloudPresso, you can do resize image online without losing quality, as well as a visually lossless compression.